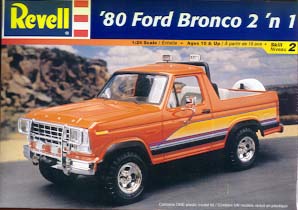
Base kit: 1980 Ford Bronco 2 'n 1 from Revell
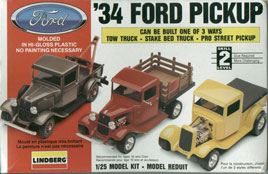
Other kits: Lindburg Ĺ34 Ford 3 in 1 tow truck
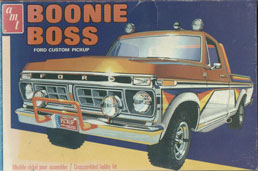
You may want to use a Ford Truck kit, and an excellent choice is the Boonie Boss. The Boonie Boss is the closest model I've found for the Ford trucks in the movie. However, these kits are very hard to come by, going for around $60.00 on Ebay.
Extra parts:
Two yellow or orange police type bubble lights
Police search light
Strip Styrene #224 1/8ö tube (.125 dia)
Rubber insulated copper wiring (for exhaust pipes and roll bars)
Sheet of clear plastic (for windshield and windows)
Four square headlights. I got my four headlights from an electric train set. It was a bunch of small replacement windows for a passenger car. They work perfectly.
Four air brake cylinders from a semi truck (for the CO2 canisters for the dart gun)
A small, thin jewelry chain (for the towing assembly).
A 3x1-inch piece of diamond plate (for the rear armor).
Sheet Styrene CLAPBOARD .040ö spacing, .040ö Thick, (for the grill).
Two round headlights.
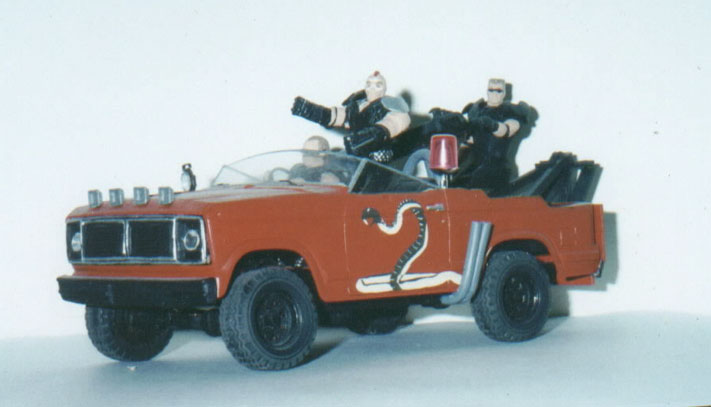
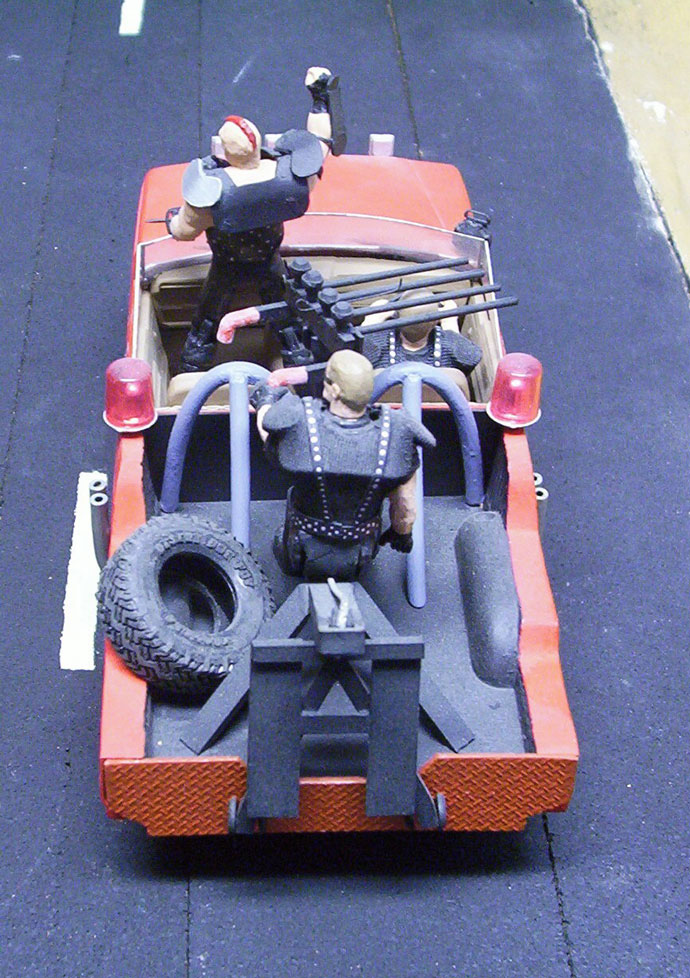
Modifications: Obviously, the truck is a convertible with much of its rear end removed. Cutting off the roof should be easy, and use pics from the movie to get the rear cuts right. The hood of the 1980 Bronco is wrong, as it is flat and fits right into the body. The hood should be curved over the sides and be the entire upper front of the vehicle. It sounds complex, but once you compare the two you will see what I mean. So, I used epoxy to secure the hood to its sides, then I sanded it over and smoothed it down. Then I used my Dremelĺs cutting wheel to cut horizontally along the top front of each of the quarter panels. Look at the pictures to see the end result. The grill of the Bronco is also wrong, as are the two square headlights. Carefully cut out the two middle pieces of the grill, and replace them with pieces of the CLAPBOARD Sheet. The headlights can easily be cut into with a drill bit of the right size, leaving you with perfect round holes for round headlights. The body of the Bronco has to be cut in half, just behind the cab. So make the cab as one piece and the rear as another piece. (In real F100s and Rangers, the two halves are not connected.) You will have to cut off some of the rear frame, but the rest of it can stay as is. Look at movie pics to create the quad dart gun, the towing assembly, the roll bars, and the rear diamond plate armor. Shape four pieces of the rubber insulated copper wiring into 90-degree curves for the exhaust pipes. You can also use the copper wiring to shape the roll bars. Glue on the police searchlight and the bubble lights. Cut out pieces of the clear plastic for the windshield and windows. Use a penknife to cut a shallow groove into the sides of the clear plastic for when you paint it silver for the metal frame. It leaves a nice outline to follow, and the groove will stop the paint from dripping onto the part you want to remain clear, if youĺre careful. Remember to change the vehicle to right hand side driving. That is about it.
Paint: Use Acrylic Steel colored paint for the exhaust pipes and Acrylic Light Gray colored paint for the roll bars. Do not use Enamel paint on the rubber insulated copper wiring; it will not dry and remain sticky forever. The rims are black, and so is the bed of the truck. The interior is a tan color. For the body I used Humbrol Super Enamel Red Matt 60. The dart gun is black, and the dart gun handles are a light red. Use silver for the grill outlines, the windshield metal parts, and the square headlight housings. For the snake artwork painted on either side, get some good pics/sketches of them. (NOTE ľ The snakes are not the same. Each snake is different.) If you are an excellent painter, you can just paint them on. I am not, so I scanned the pictures and went to work on them with my Paint program. After some long hours, I had them to the size and color I wanted. Then I printed them onto these special model decal sheets I bought from MicroMark. I carefully cut them out and applied them like any other model decal. If you want to skip making your own decals, send me an e-mail and I will send you the saved file for each snake.
Any questions, please ask! Good luck and letĺs see some pics!
My first Red F100, with the painted on snake art
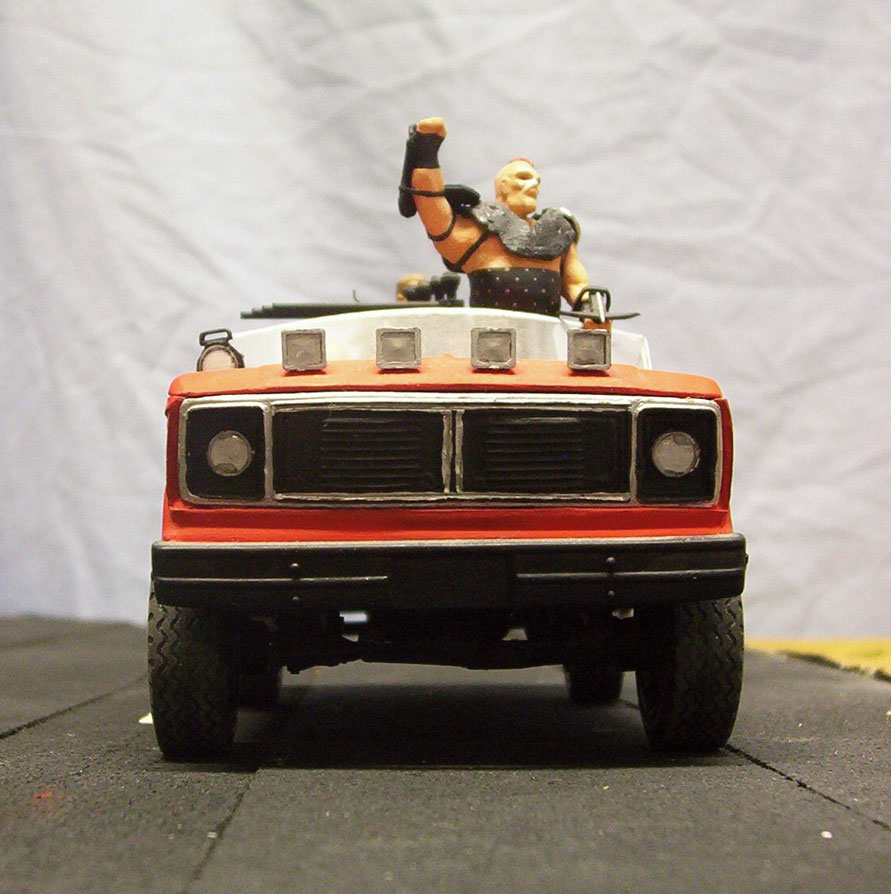
Front
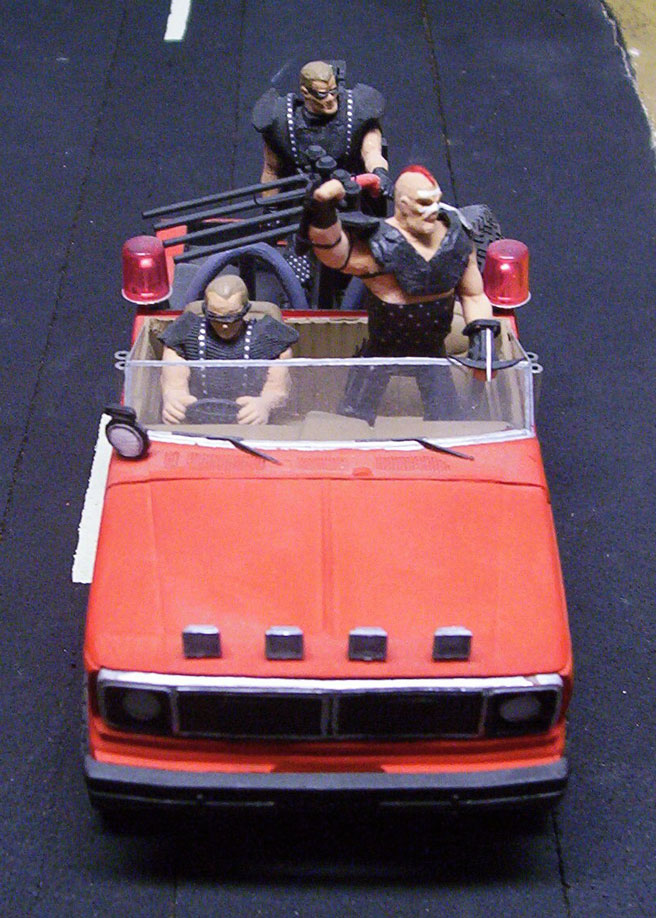
Top
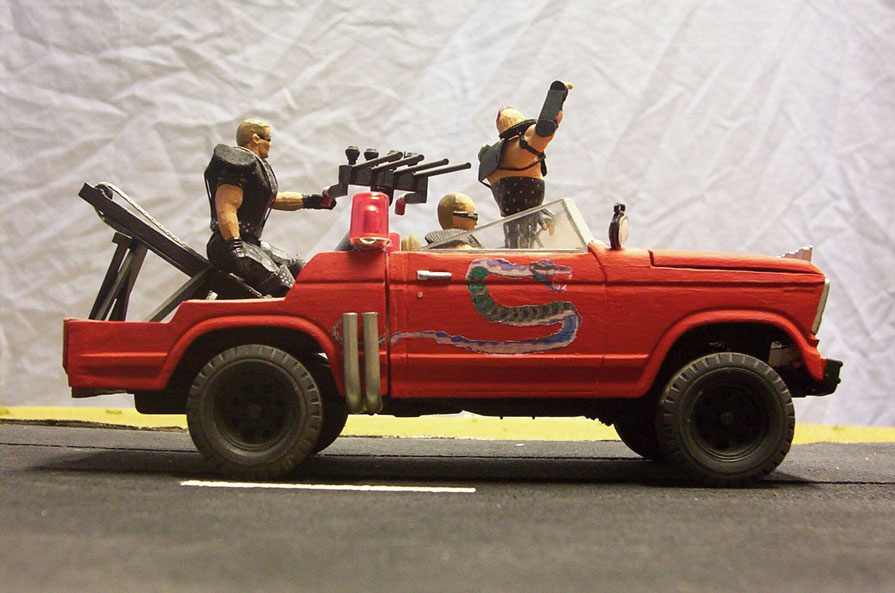
Right side; notice the snake art is different from the other side
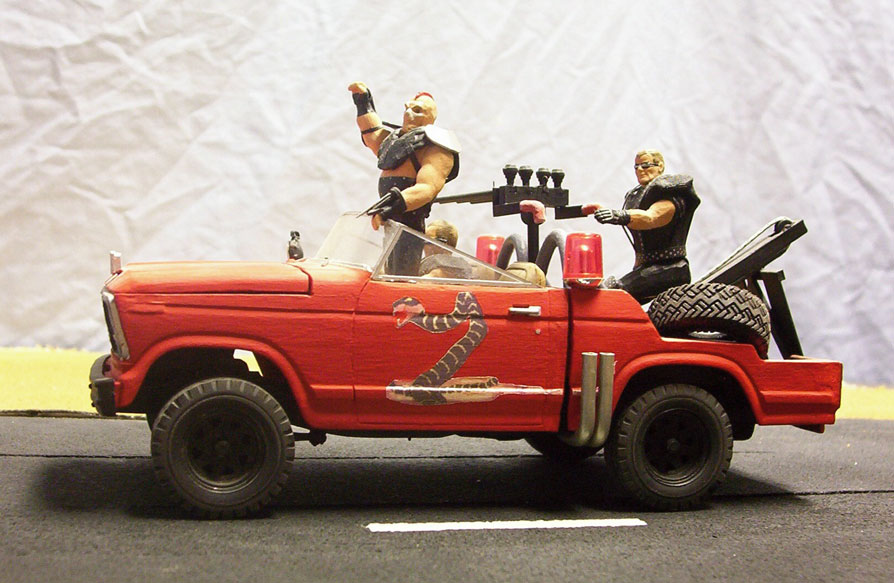
Left side; notice the snake art is different from the other side
Rear