

Other kits youíll need: Truck Stop Accessories No. 764 from Italeri

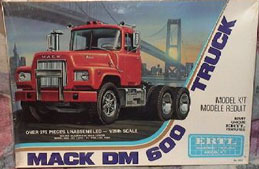
Extra parts: The Testors Mack comes with the wrong front rims, so find another truck with better rims, like one of the two I mentioned above. The Mack had rims with six spokes. Youíll need two matching air cleaners, so find two or make one out of plastic pipe to match the one that came with the Mack. To make the two 90 degree air intake parts, get out your old Bon Jovi cassette tape and crazy glue the two halves of the tape together. (They use screws but you need something better.) Then cut out and sand down two corners. They work well for those two pieces. Also, get two flat LEGO pieces, 12x4. That is, 12 little holes by 4 little holes, not 12 inches by 4 inches. Cut off one strip of 12 from each, making them 12x3. Then cut out all the circles (wire cutters work well for this), and sand them as flat as possible. Then, take a hacksaw and carefully cut 2 grooves down the long side of each of them. (While youíre at it you might want to make 2 similar pieces, 20x5, for the tanker) A good hobby store sells sheets of thin plastic for cutting and shaping, buy one of .015Ē thickness. (0.4mm) The company is Evergreen Scale Models, Sheet Styrene, #9015 I-5. This one will be used for the front ram armor. Try to find some sheets of 1/24th scale diamond plate, as many parts can be made from this material.
Also, buy a .060x.125 plastic strips #156 P-4 from the same company. Youíll need it to make the cow catcher armor.
You will also need some HO scale fence material for the exhaust guards. A company called Scale Scenics makes this, called Aluminum Micro-Mesh. Buy three or four more of these if you also want to make a Lone Wolf model.
*NOTE Ė I ended up buying two additional Mack Truck model kits, one only for its six-spoked rims. The other one, for parts, was a Junkyard Dog Mack Truck.

Modifications: The frame of the Testors Mack will have to be shortened, I think by about half an inch. Shorten the drive shaft as well. Build the Mack with only the left side battery box. You donít need to put the bumper on the kit. The left side fuel tank has to be lengthened by 5/8ths of an inch. From the Italeri kit youíll get a flat piece of diamond plate. CAREFULLY cut that into parts to lengthen the passenger side fuel tank. Save as much of the diamond plate as possible, youíll need it. The circular air tank has to be shortened to 1 and 1/8 inches. If you canít find any diamond plate sheets, take the Mackís sleeper cab and cut it up to make the rear wheel top guards. Some of it is diamond plate and the rest is metal-looking, so it works fine. I made my Mack in 1990, so I forgot exactly how to cut up the sleeper cab, but measure everything carefully and you should be OK. Donít forget the downward angle of the outer edge of the guards. The four tail lights are mounted on an I-beam type piece of metal. You can make the I-beam part from 3/16Ē H-Column #286 Strip Styrene. You have to convert the Mackís steering wheel, pedals, and dashboard to the right side; not too hard. Very carefully cut off the right side door. The plastic there is thin, so watch it! Use EXTREME care when cutting off the right side of the Mackís windshield. If you cut it wrong it will spiderweb and then itís ruined, so take your time. Your long custom square fuel tank goes on the left. The stock square fuel tank goes on the right front, and the circular air tank goes behind that. Before you put the tires on sand them lightly. It gives them a nice road-worn appearance. Youíll have to find a little handle for the right side by the driverís door. The exhaust pipes must be custom made, too. Make or find two to match the ones in the movie. I used VCR cable; it is the perfect diameter for the exhaust pipes and it bends easily. Note the lights and horn on top of the cab and put them on accordingly. Now, the front ram plate. There are quite a few pics around showing the front of the Mack, so use them. First, build the large grill from the Italeri kit. Cut 2 flat pieces of Styrene to fit onto the front of the grill. The main rectangular large piece goes on the center and the small rectangular piece goes on top. Measure and cut out the 7 air slits centered on the large piece. Then, glue them into place. Take the plastic strips and make 16 bars for the cow-catcher part of the bumper. Make the front part of the cow-catcher, and donít forget the four bars that go from the front bar to the bumper on the original grill. Fit it into place on the front frame. If you really want to make it accurate, buy some Hexagonal rods to cut and use as bolts for the armor. You can find some from a company called Plastruct, called .030Ē (0.8 mm) Styrene Hex Rod. The Mack in the movie is a quad-shifter, so make two identical gear shifters. The seat stand will have to be custom made as well. Get some copper wiring for the air brake cables that connect to the tanker. Wrap it around a pen so you get the circular twist you need, then paint them black. That is about it. Build the rest of the model as in the directions.
Paint: The front rims are red with a steel outline, the rear rims are silver. For the frame and other orange parts I used #414185 SP Daylight Orange NB by Polly Scale. That is the main orange color for the truck. For all the extra armor (wheel guards and front bumper add-ons) I used a slightly darker CN Orange #11 by Floquil. The light orange paint job on the hood and sides is #414257 D&RCW Yellow by Polly Scale. For the main color of the hood and cab I used Green Drab FS 34086 by Model Master. The interior of the cab is Off-White.
Any questions, please ask! Good luck and letís see some pics!
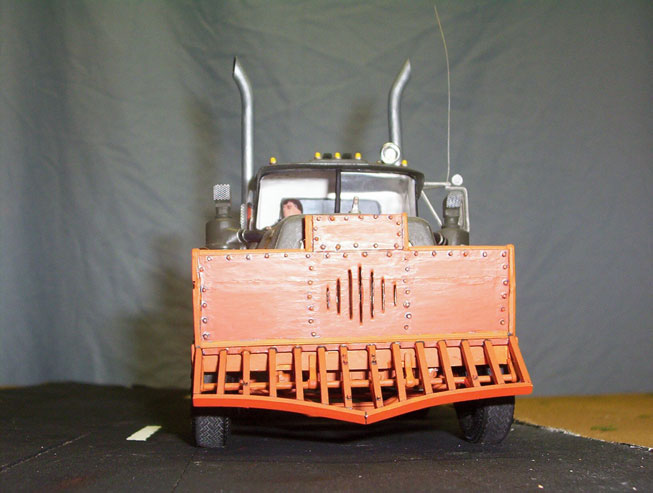
Front
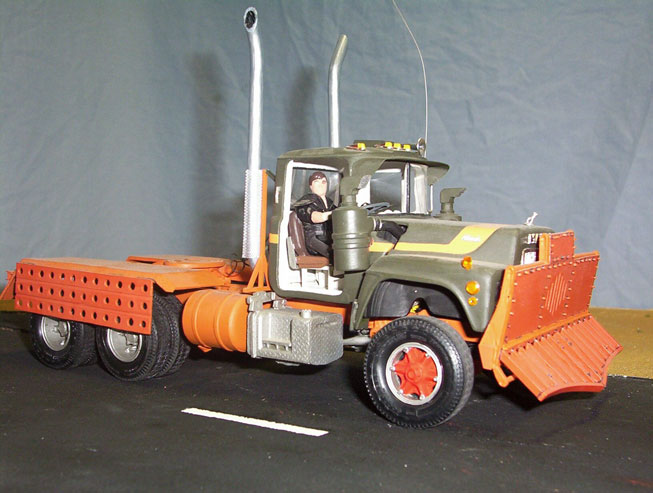
Right front

Rear
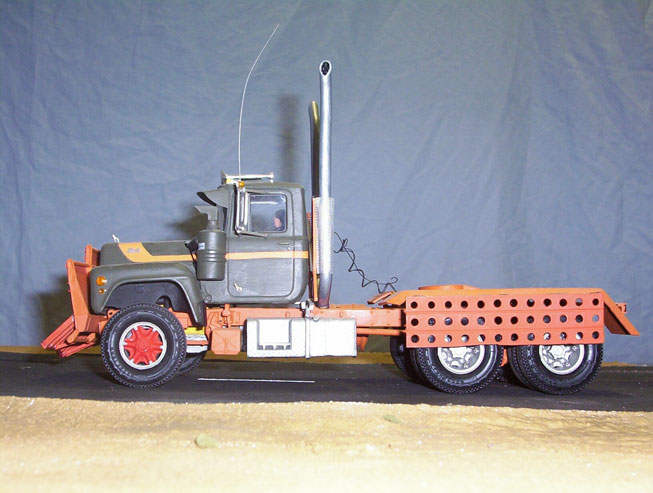
Left side

Top
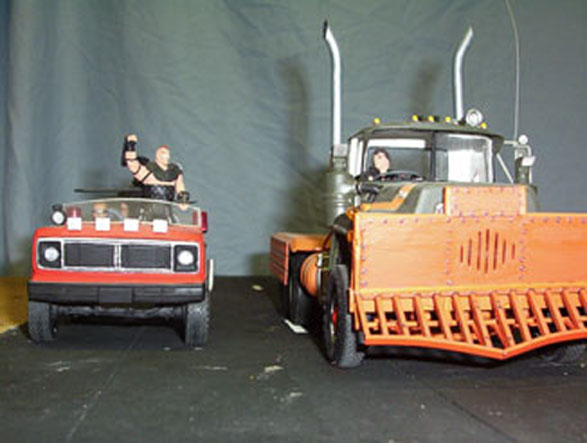
Max vs. Wez